Kennedy's Fourth Birthday Party

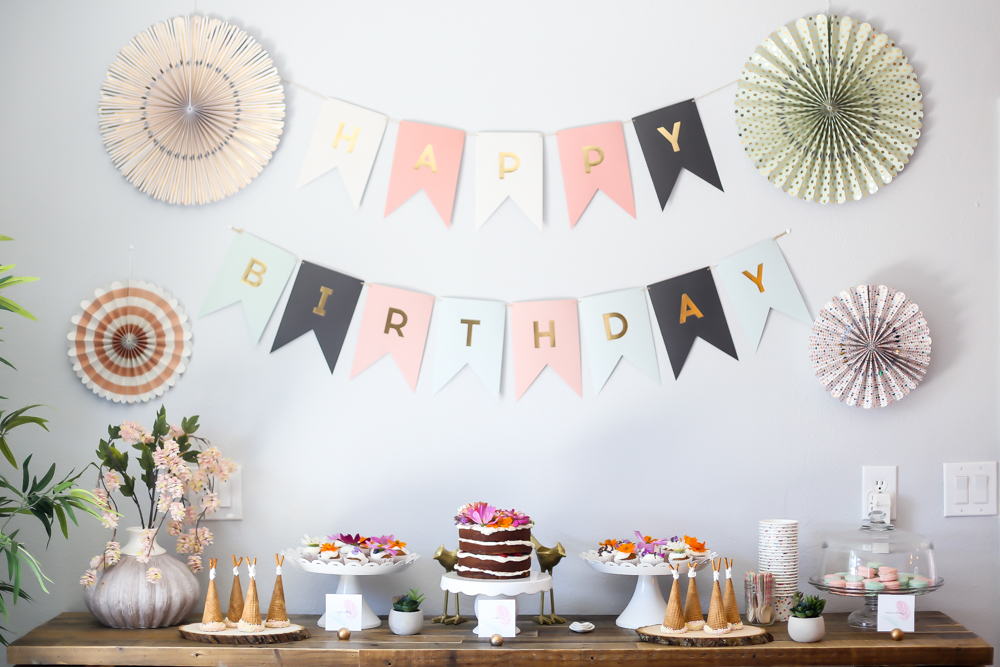
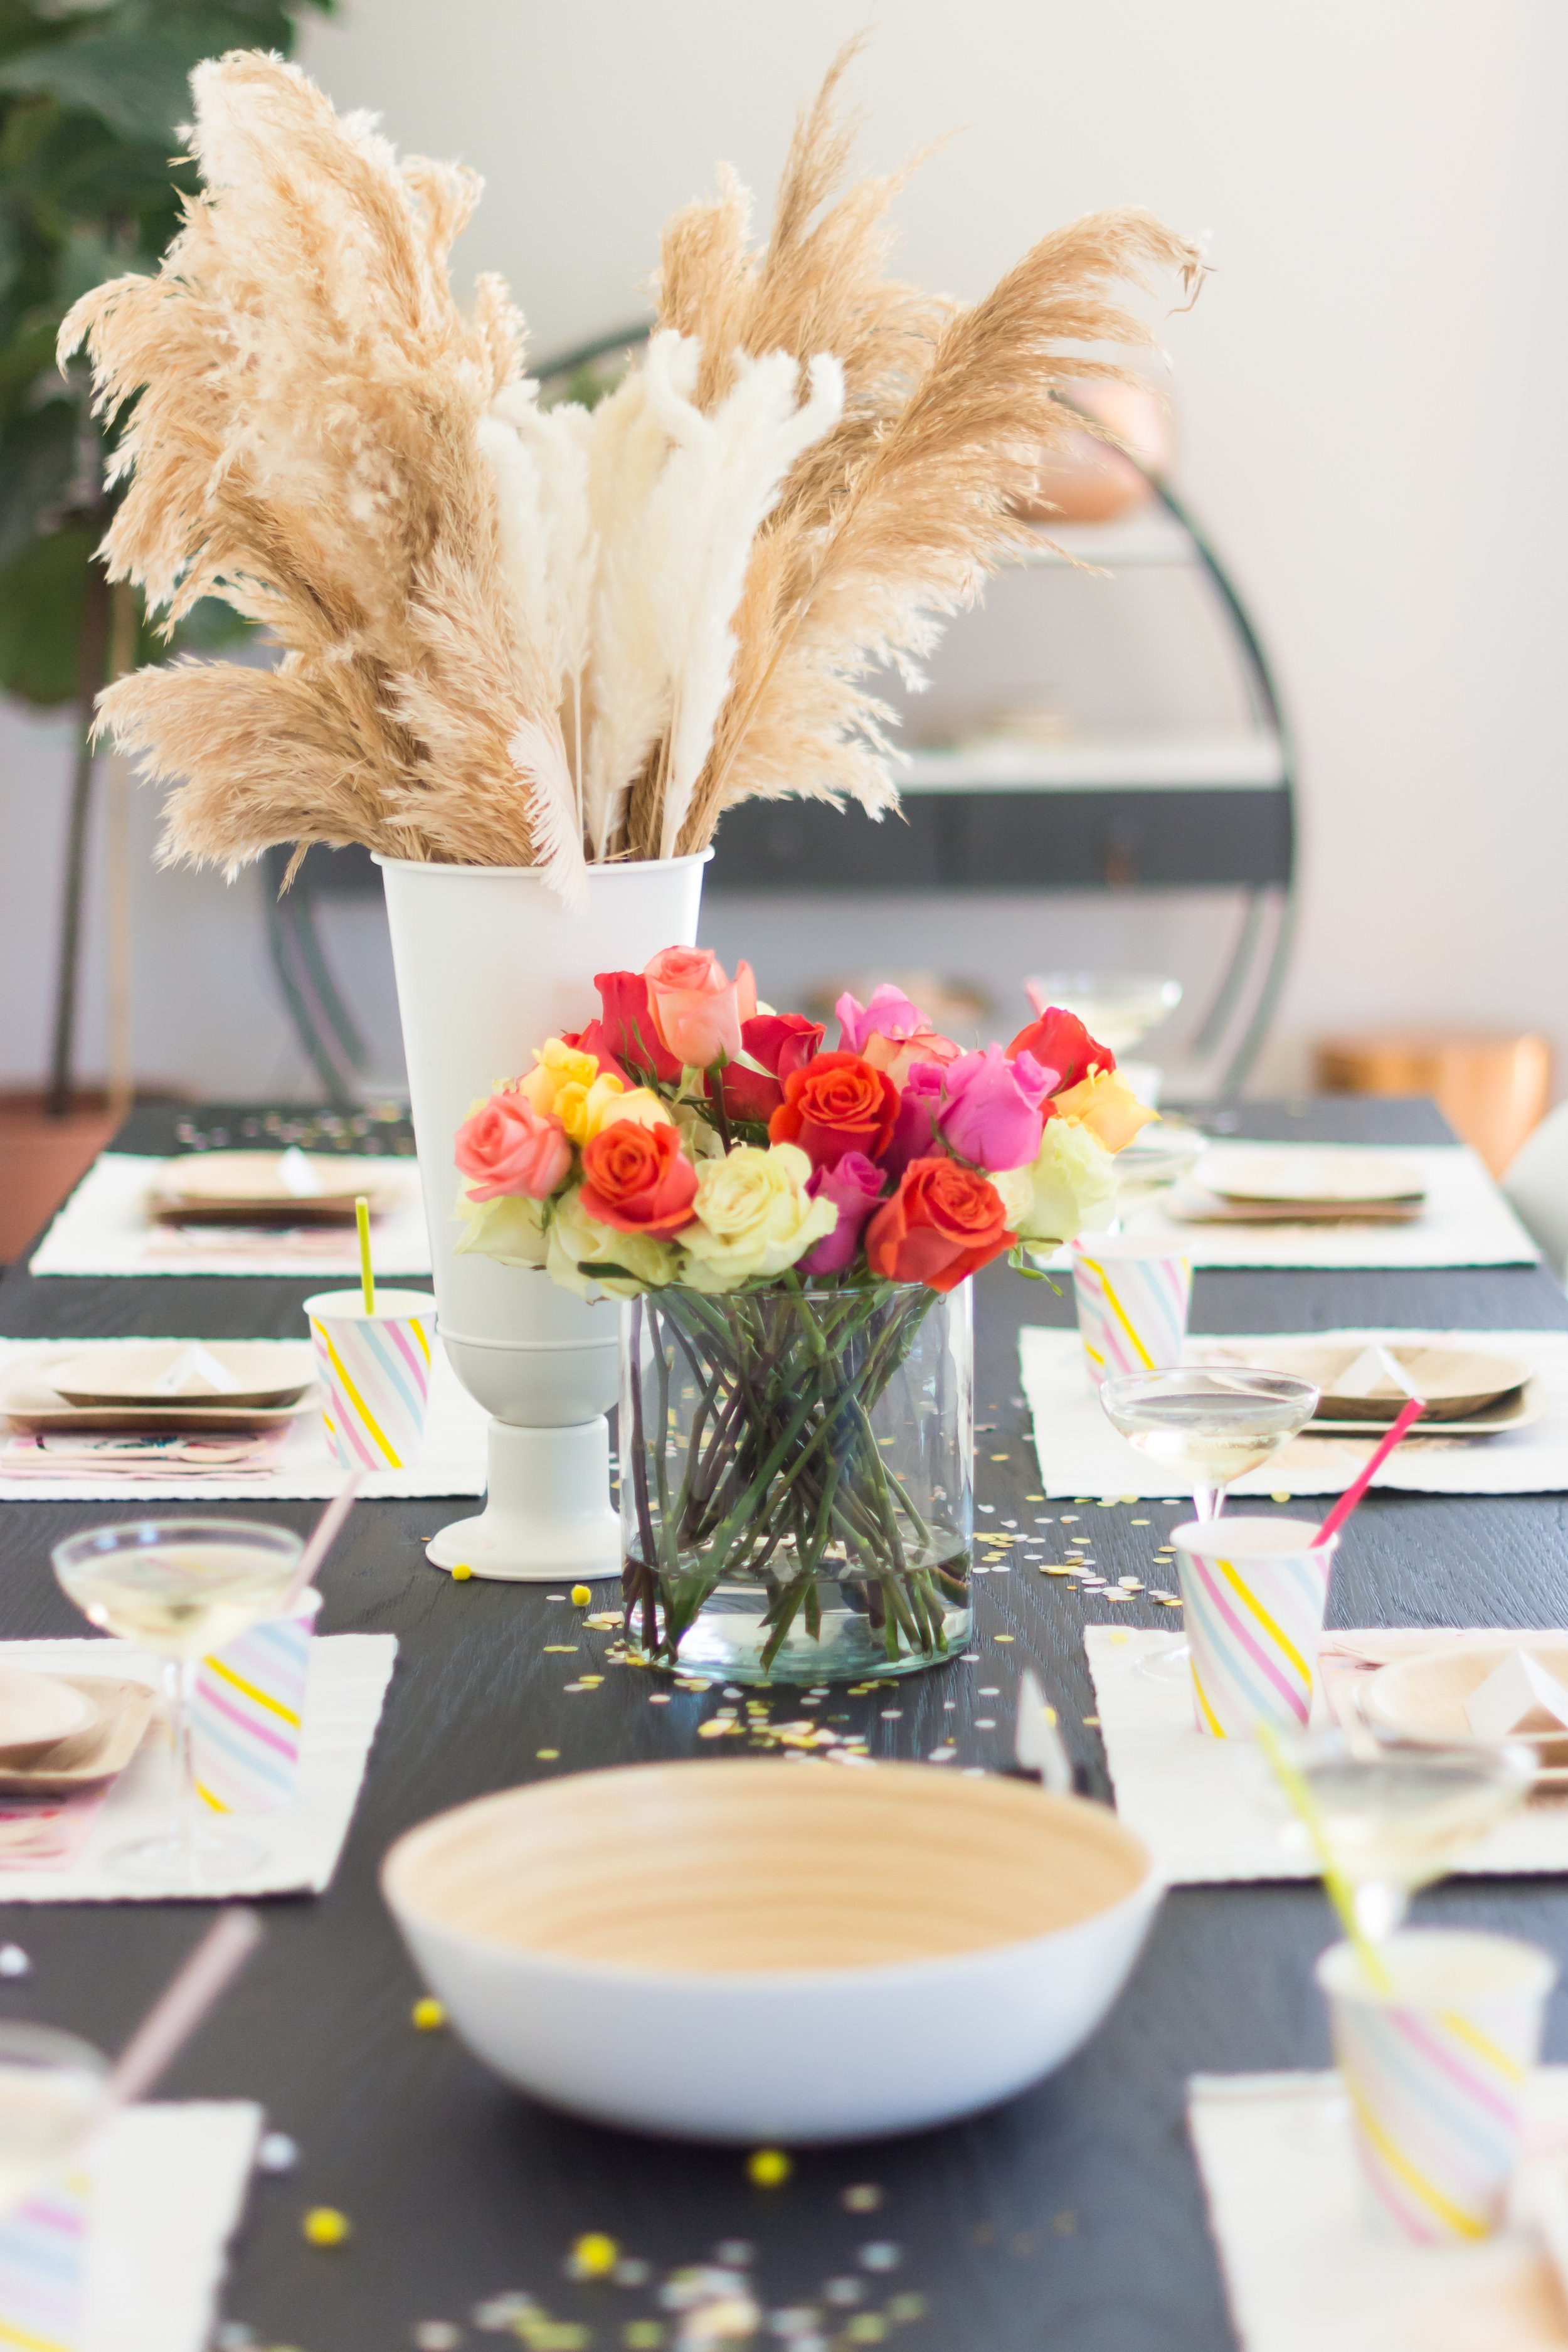
For Kennedy’s fourth birthday party, we wanted to throw a party that was suitable for both children and adults. The llama birthday party collection at Target gave us a really fun base to then plan our party decorations from. With the earthy nature of the llama and look of the studio, we used these palm recyclable palm leaf plates for our flatware; I absolutely love this set!

IMG_5495.jpg
DSC_0187.jpg
DSC_0211.jpg
DSC_0218.jpg
DSC_0181.jpg
DSC_0306.jpg
DSC_0208.jpg
IMG_5531.jpg

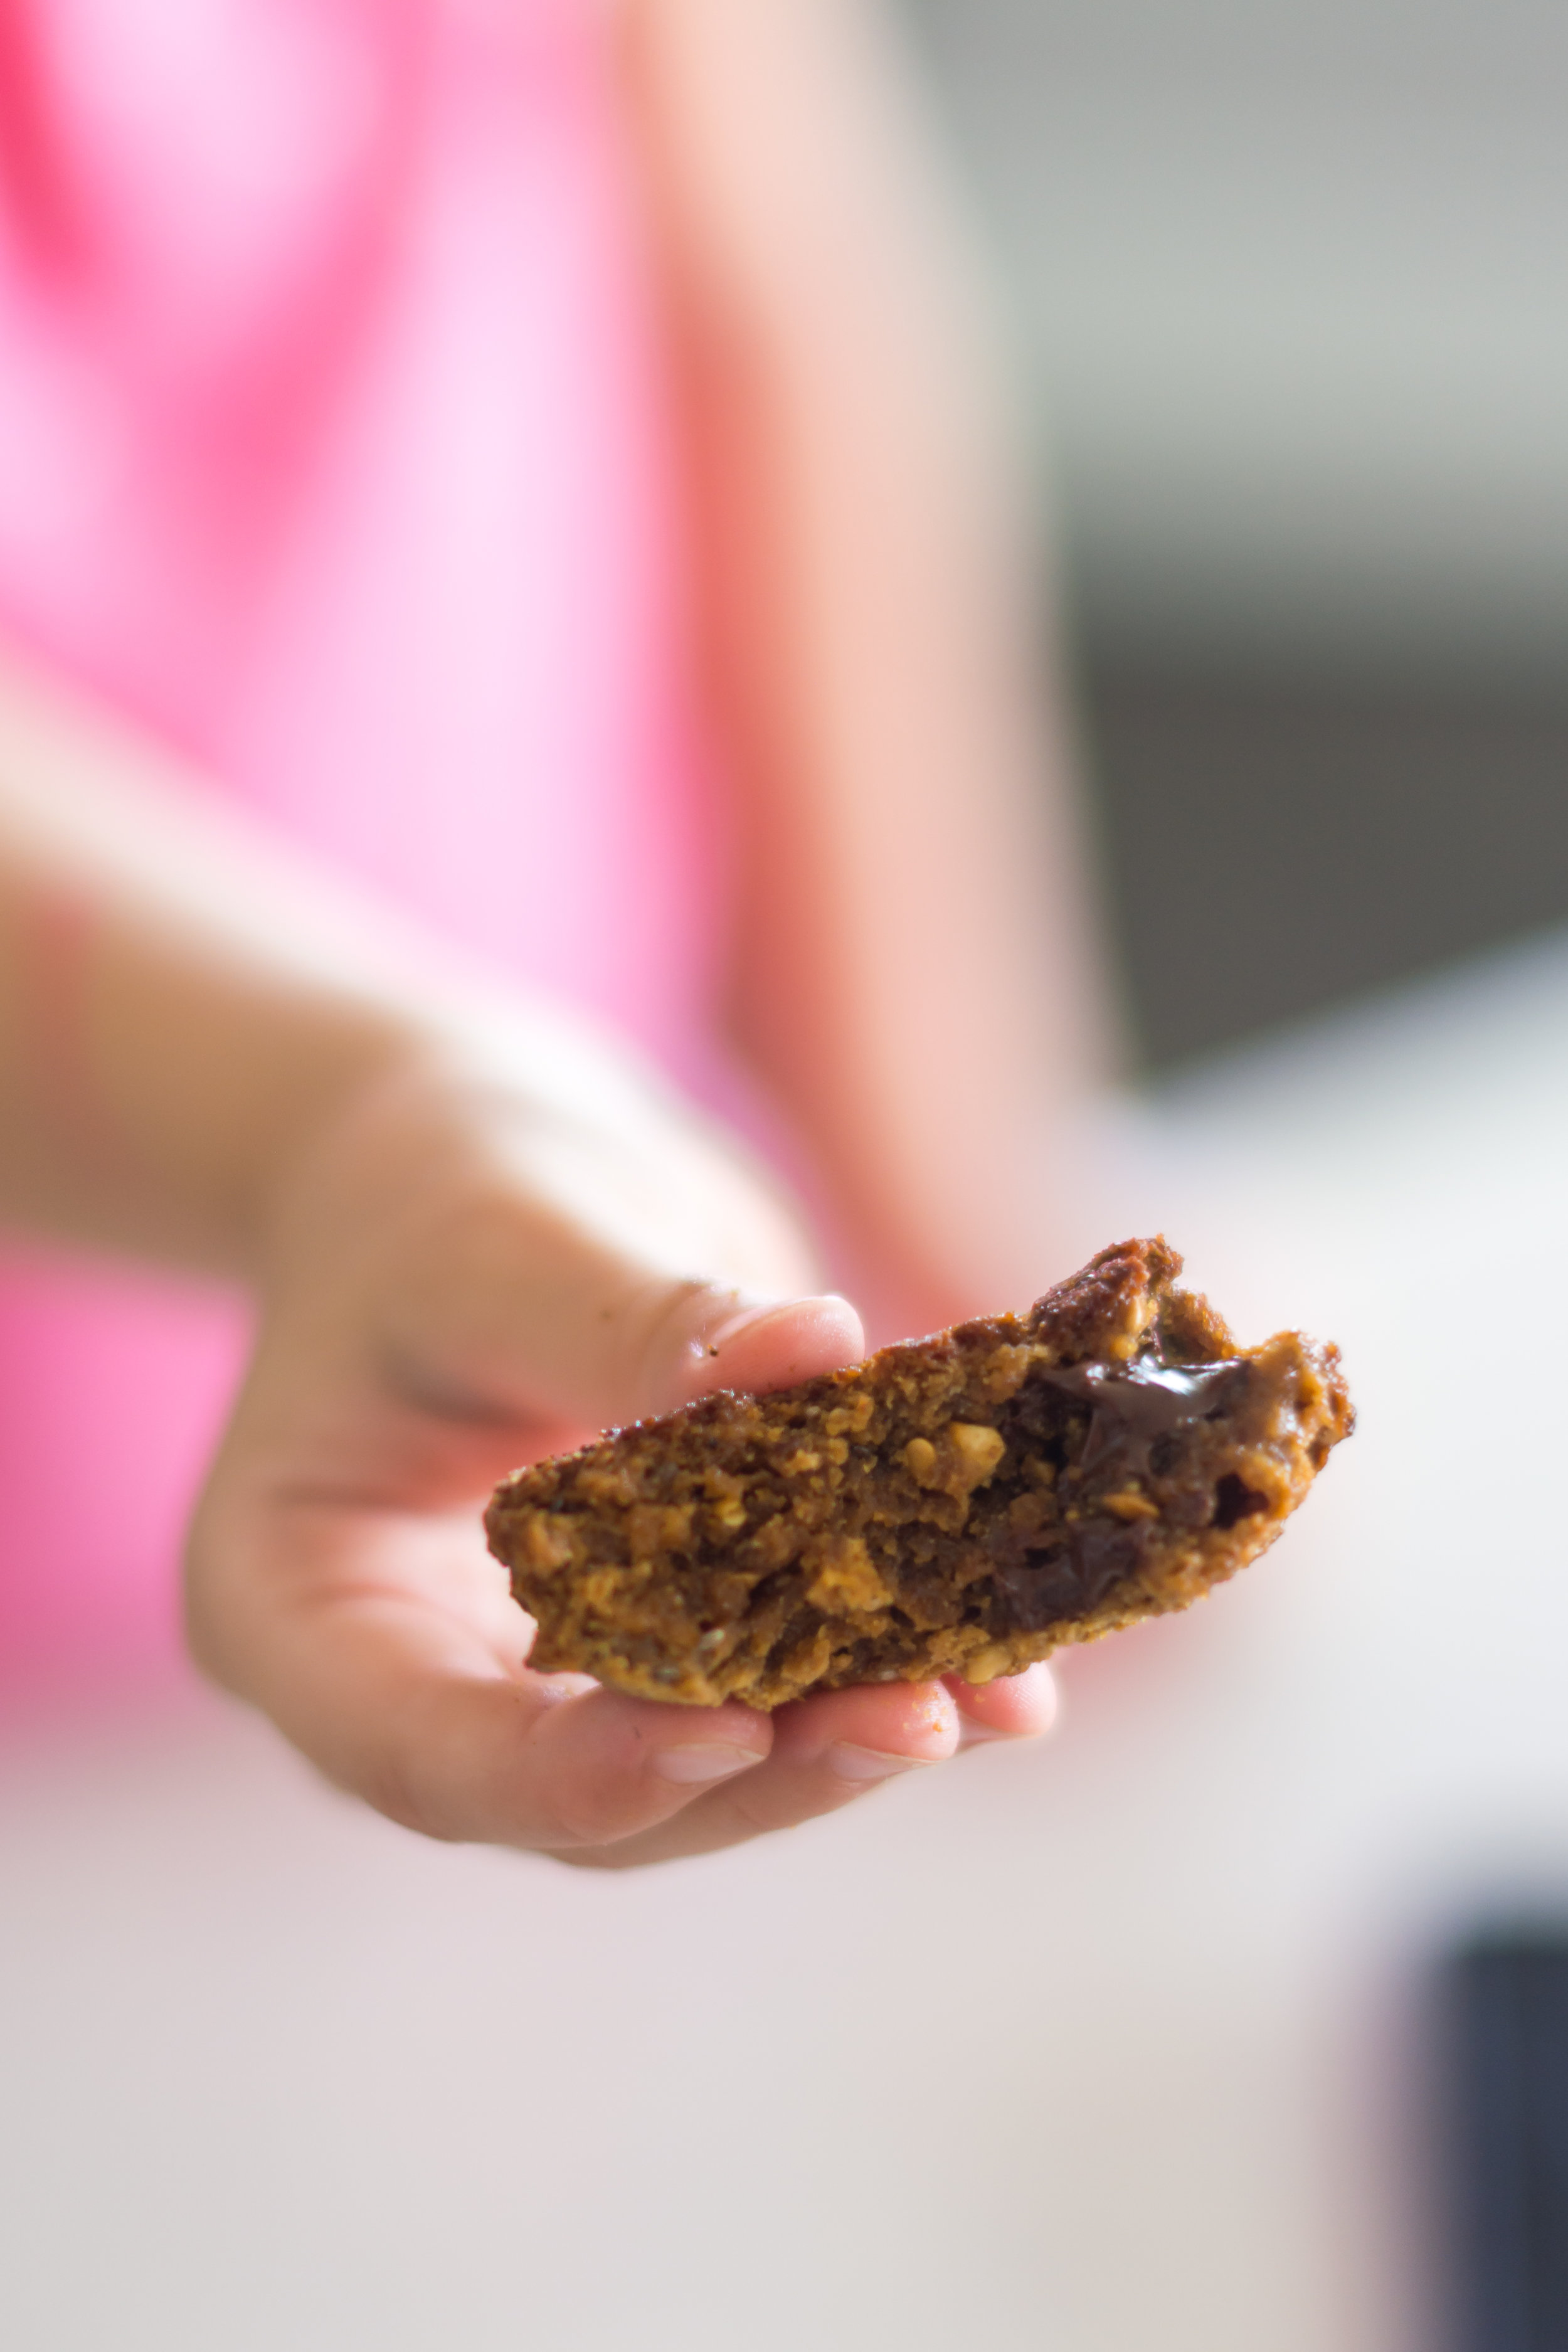
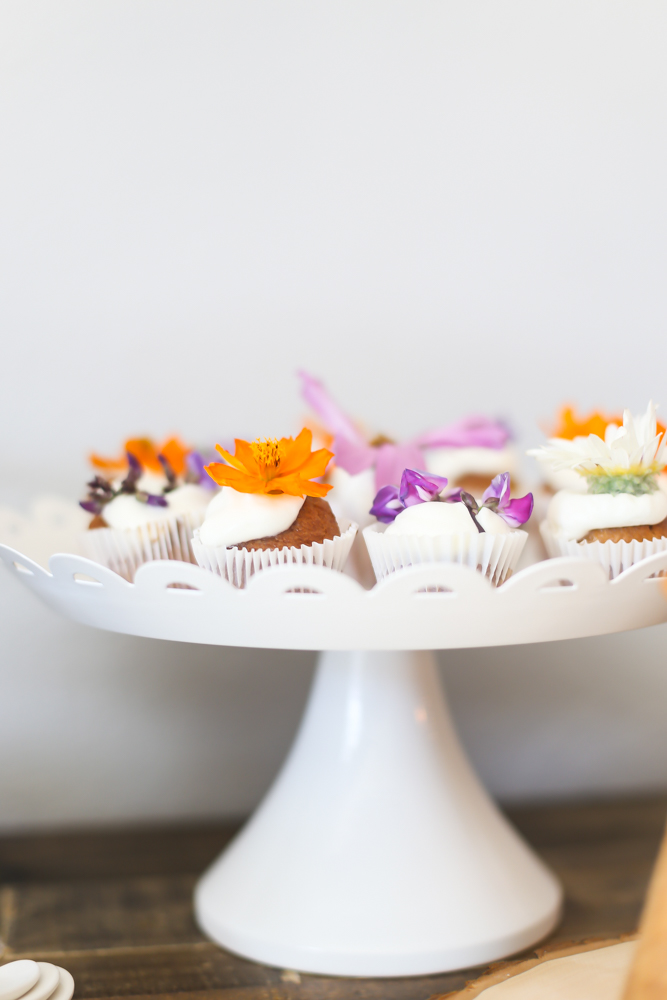
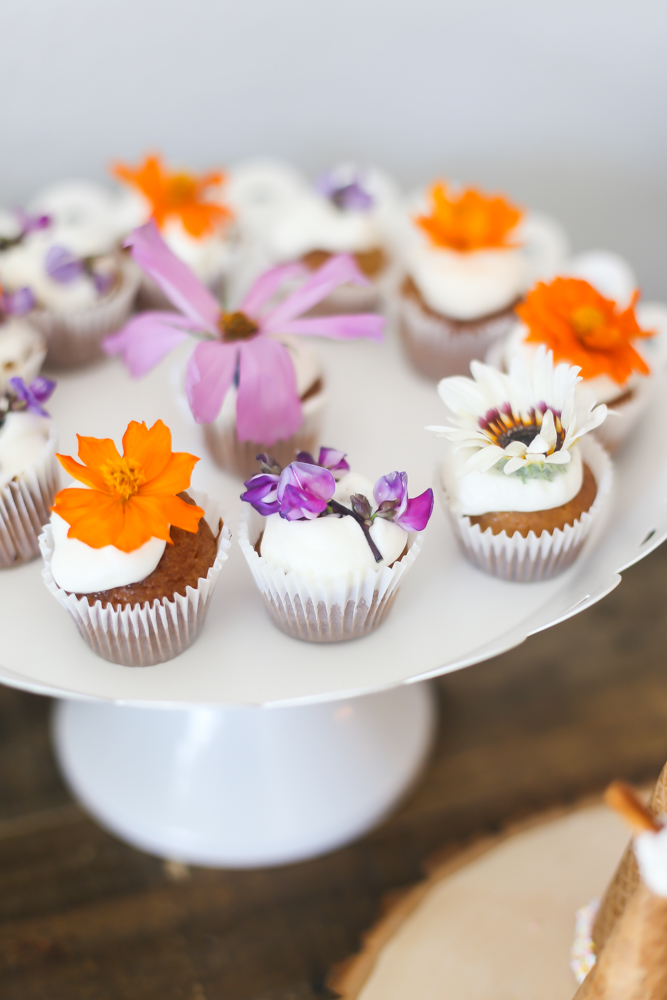
Since Kenny and I are both gluten-free, Urban Cookies has the BEST, local choices for gluten-free cupcakes and donuts (donuts are vegan too).

IMG_5546.jpg
DSC_0246.jpg
DSC_0274.jpg

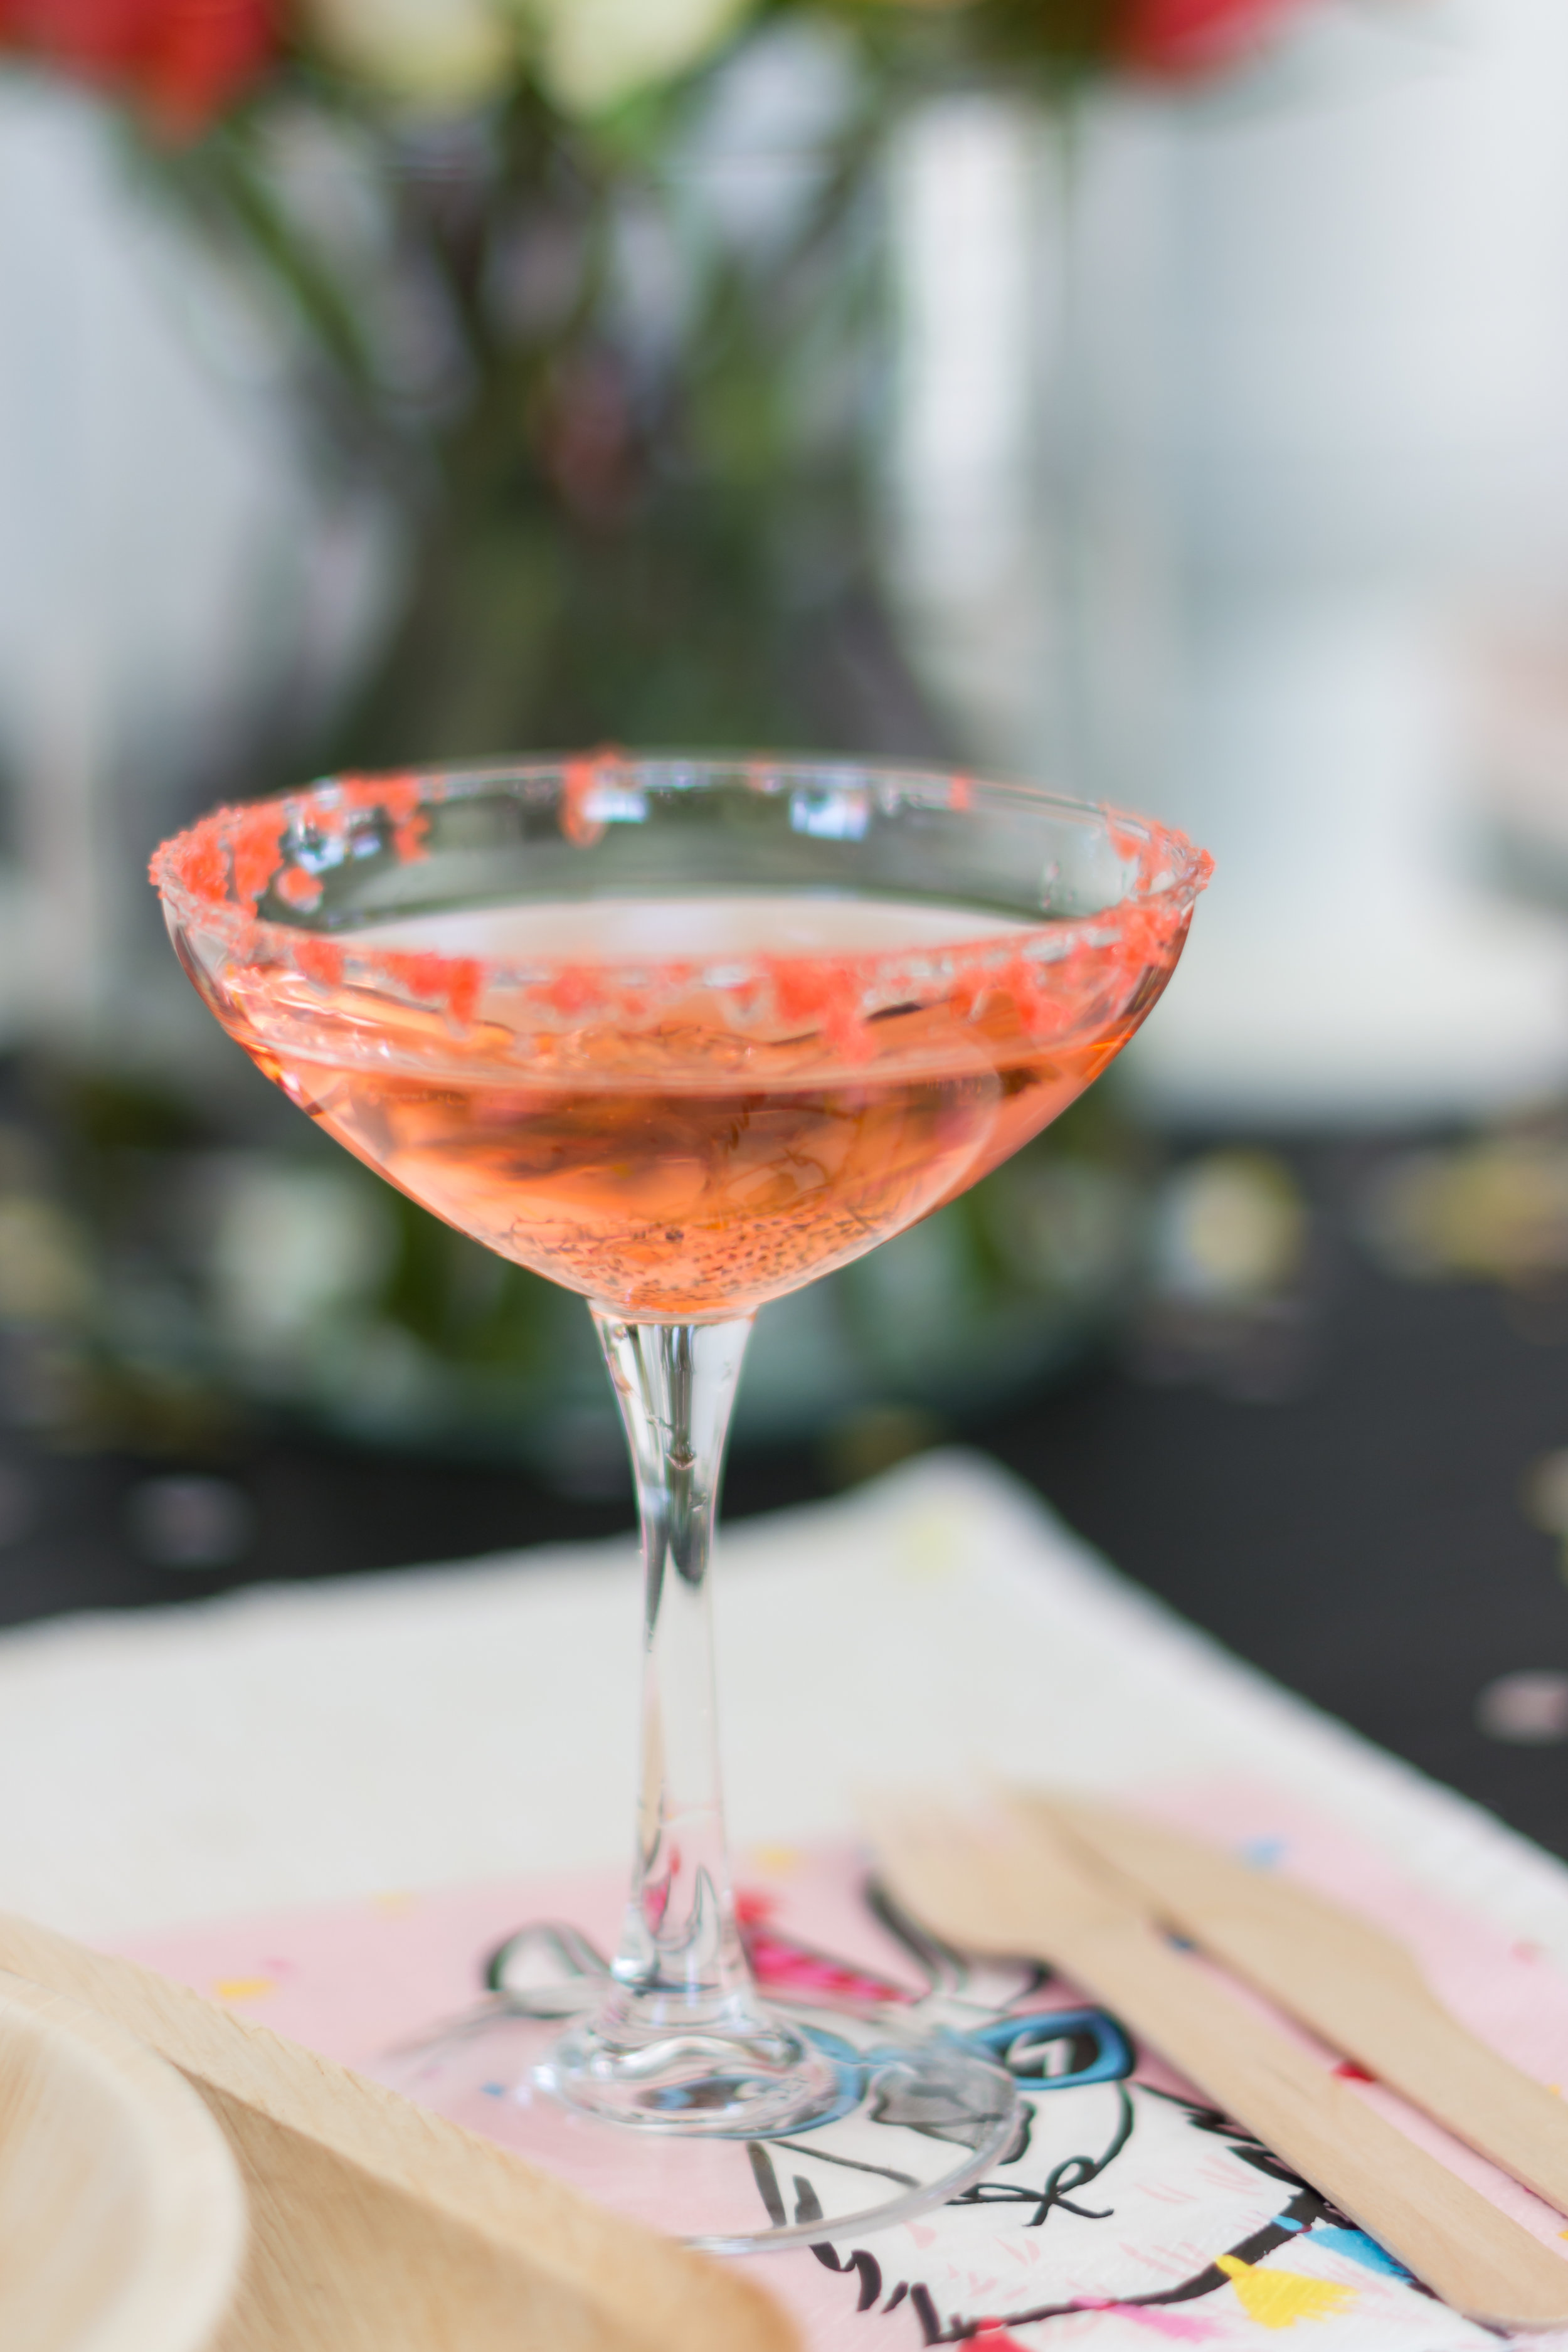
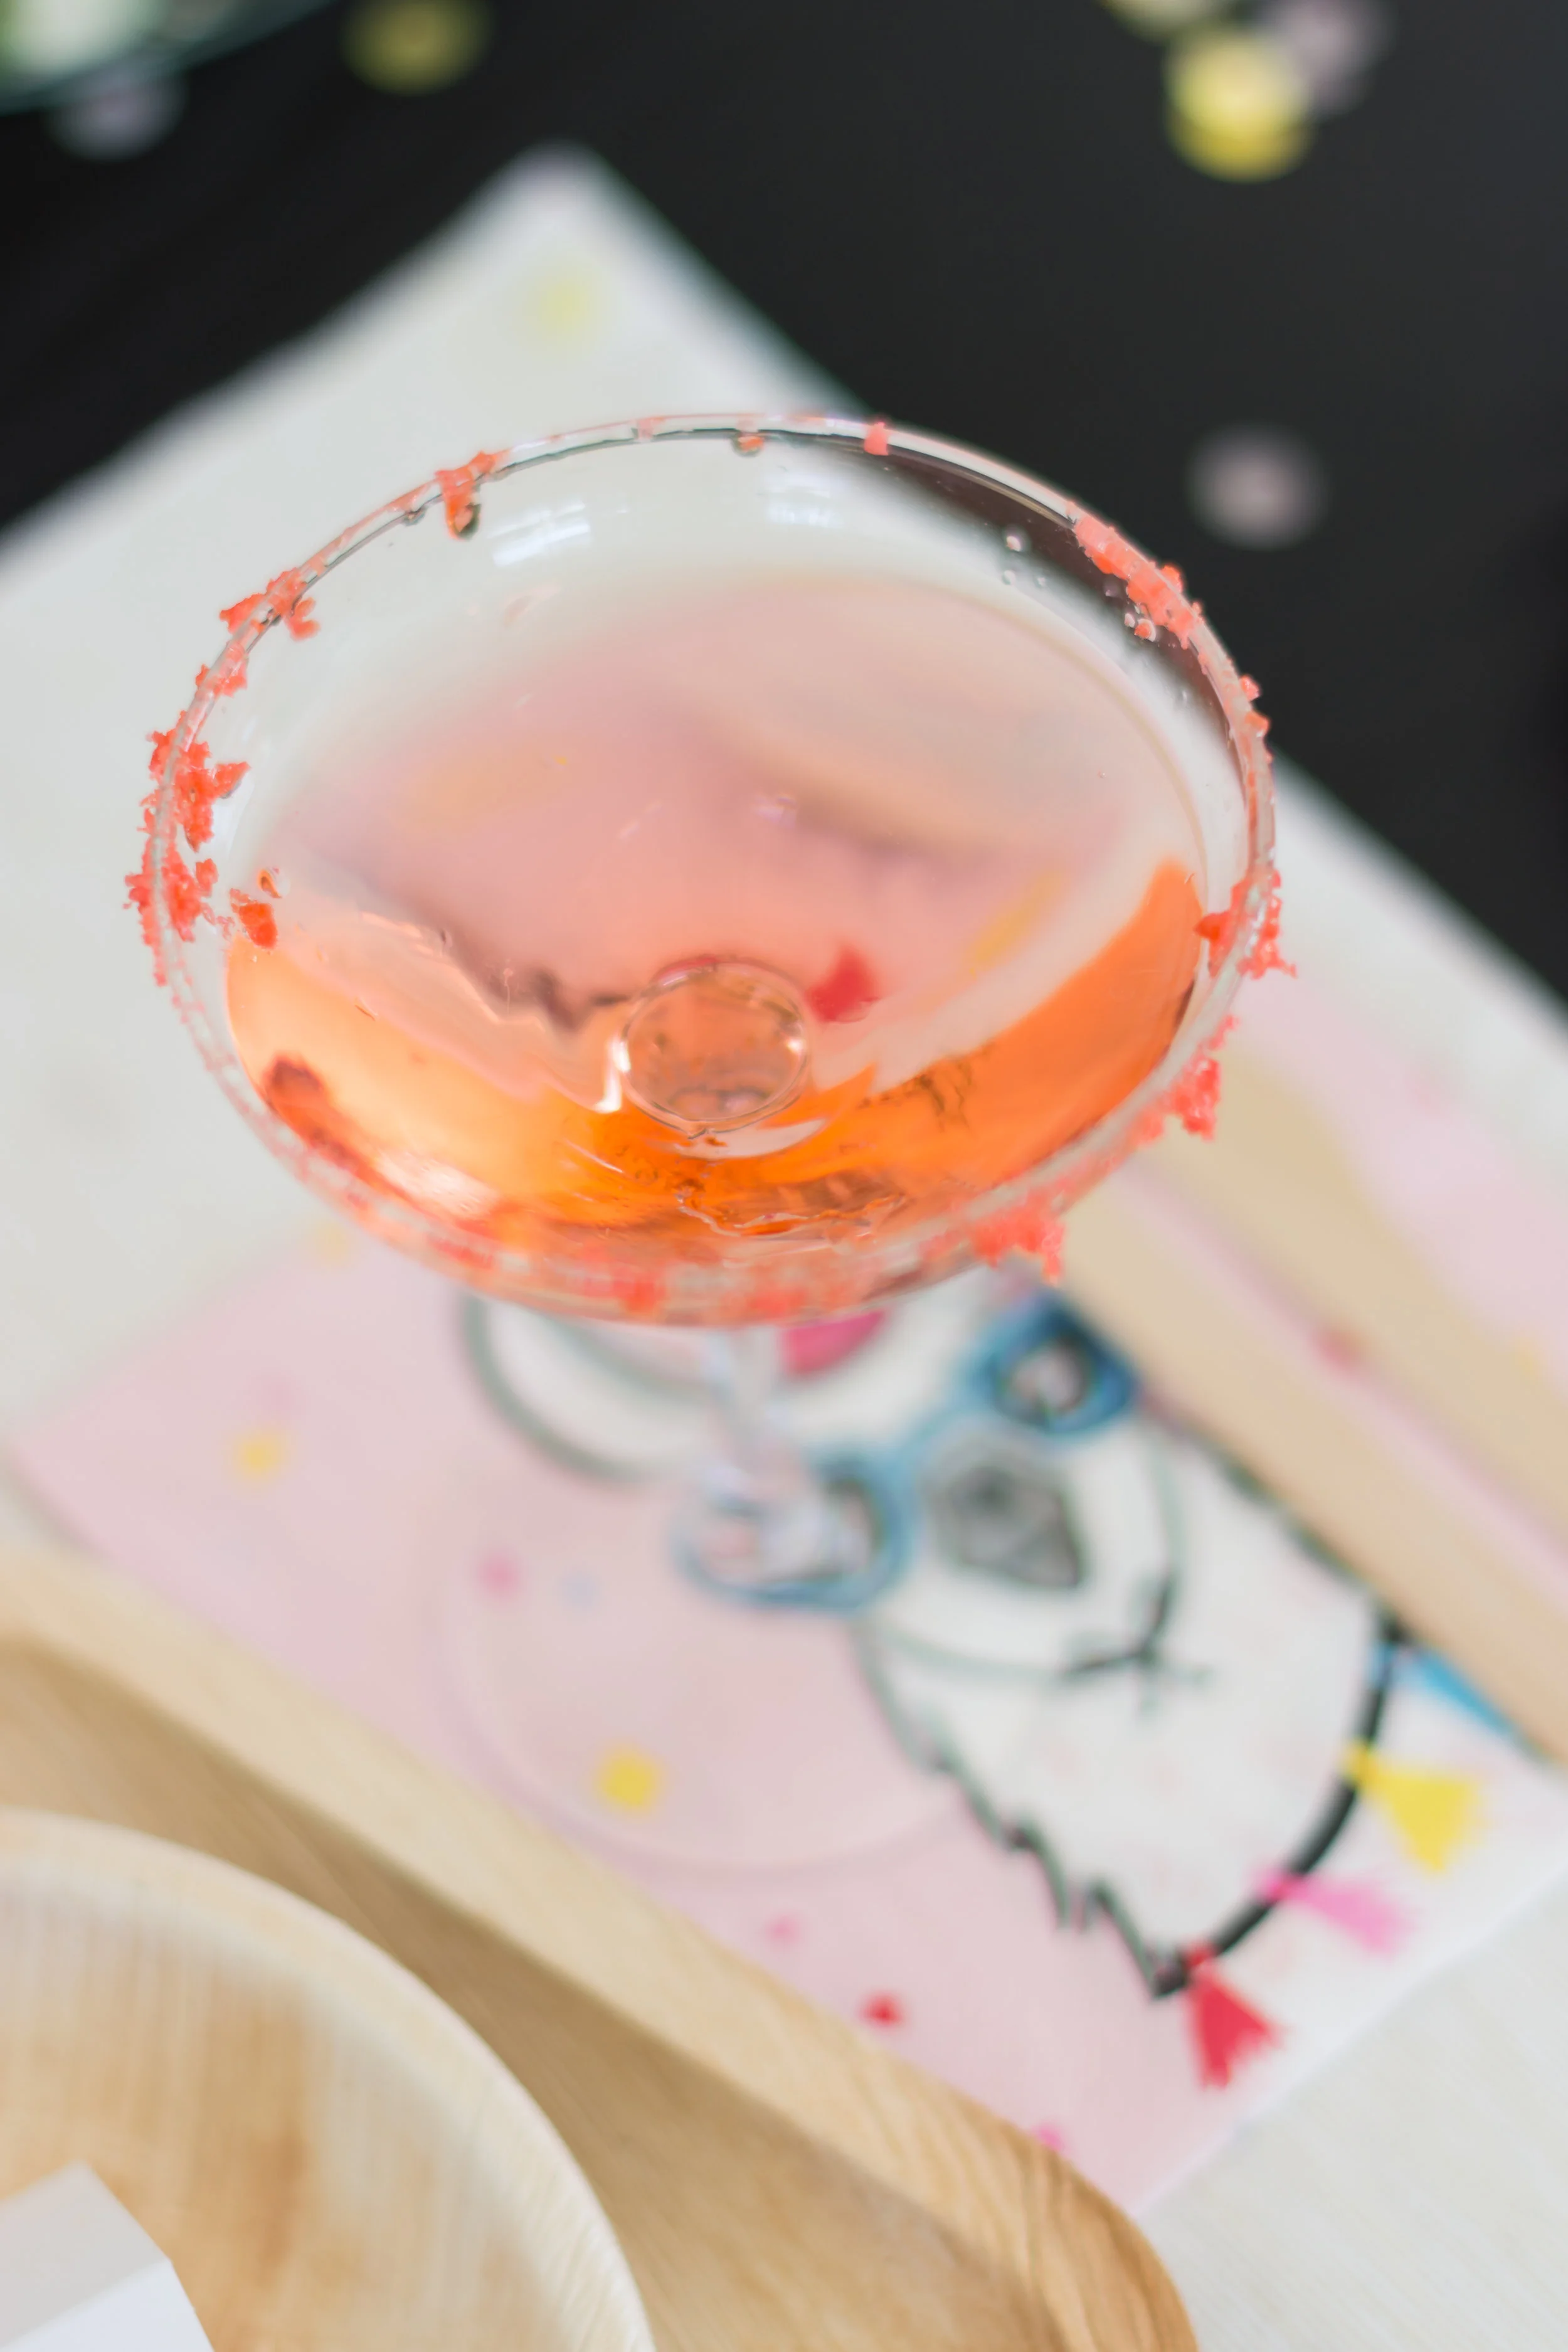
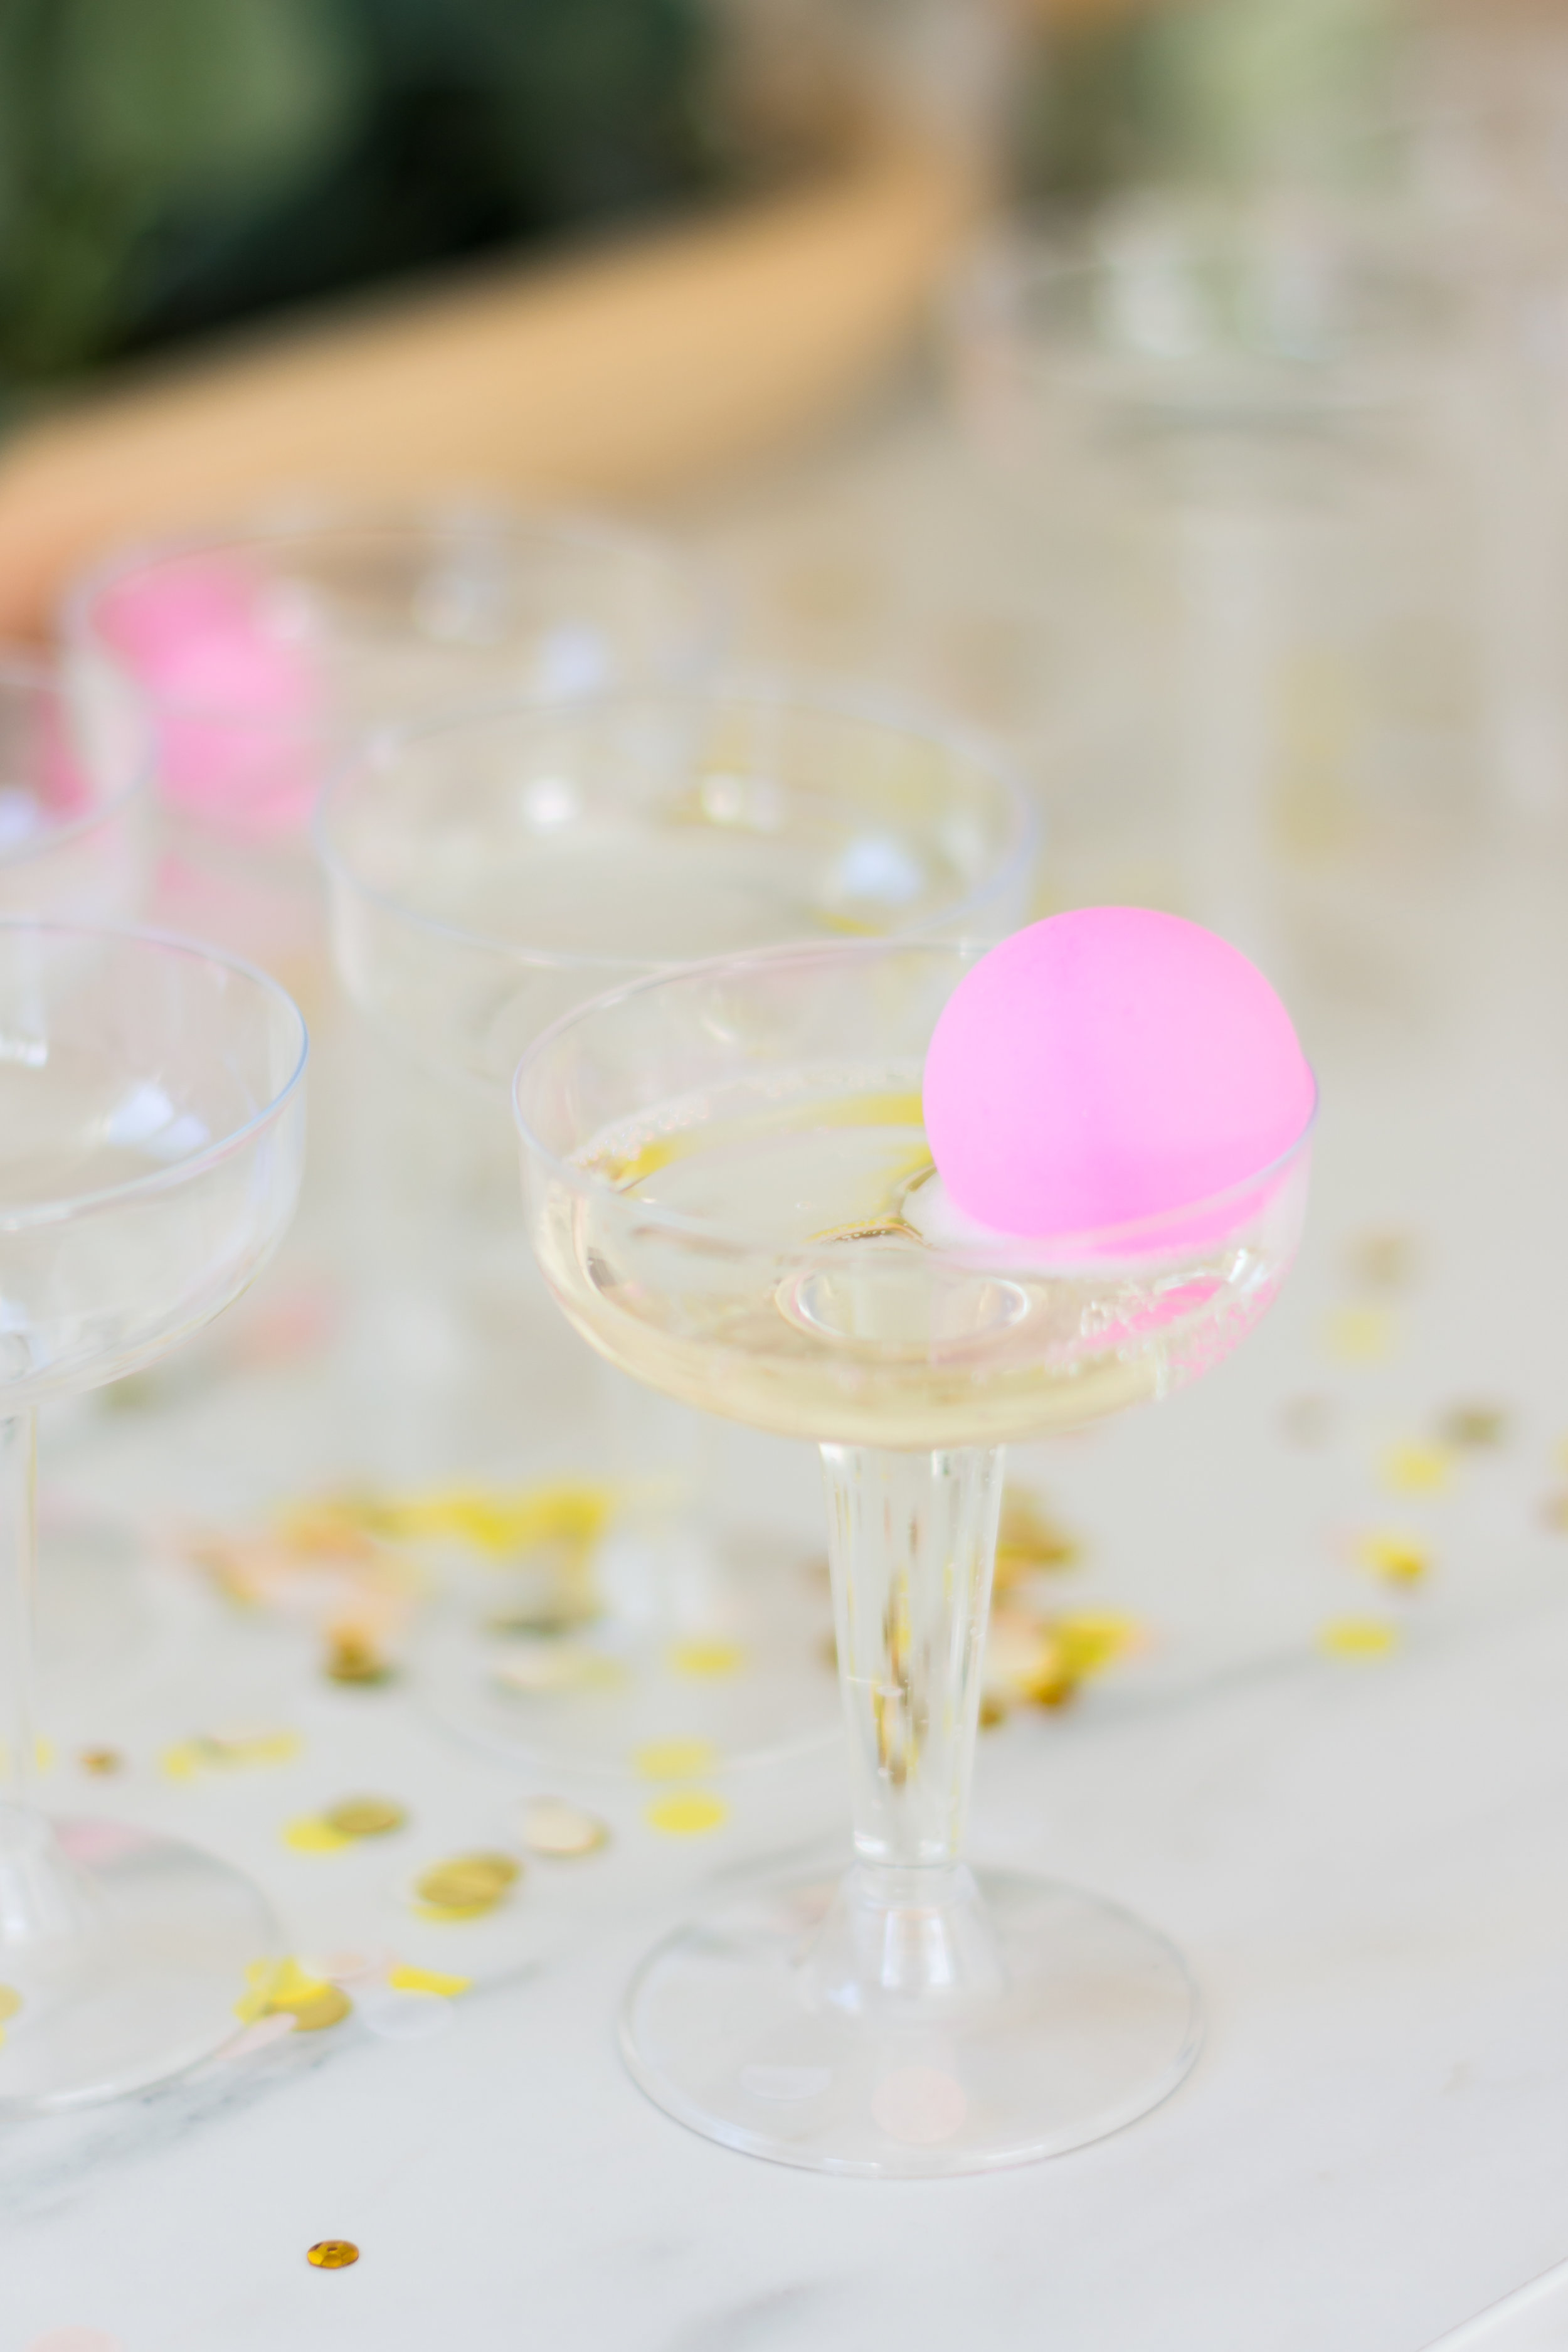
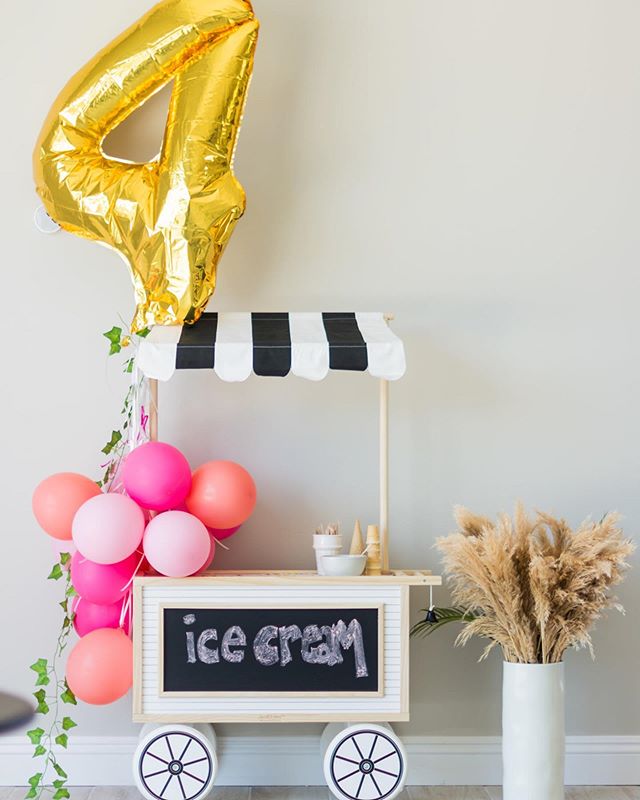
Given our party theme, where “kid party meets adult party,” we added some fun things from our childhood and early adulthood to accent the “grown-up” treats. For instance, the prosecco glasses were lined with pop rocks, giving our guests quite the surprise when they took their first sip! Secondly, Kennedy’s ice cream cart was accompanied by a three tiered galvanized tray of self serve ice cream, dishing out toppings like sprinkles and chocolate syrup to adorn (thank you for the inspiration Sugar and Charm!) To say the least, the “grown ups” and kiddos were all having fun by noon … Prosecco pong, anyone?!?!

DSC_0254.jpg
DSC_0255.jpg
DSC_0226.jpg
IMG_5494.jpg
DSC_0347.jpg

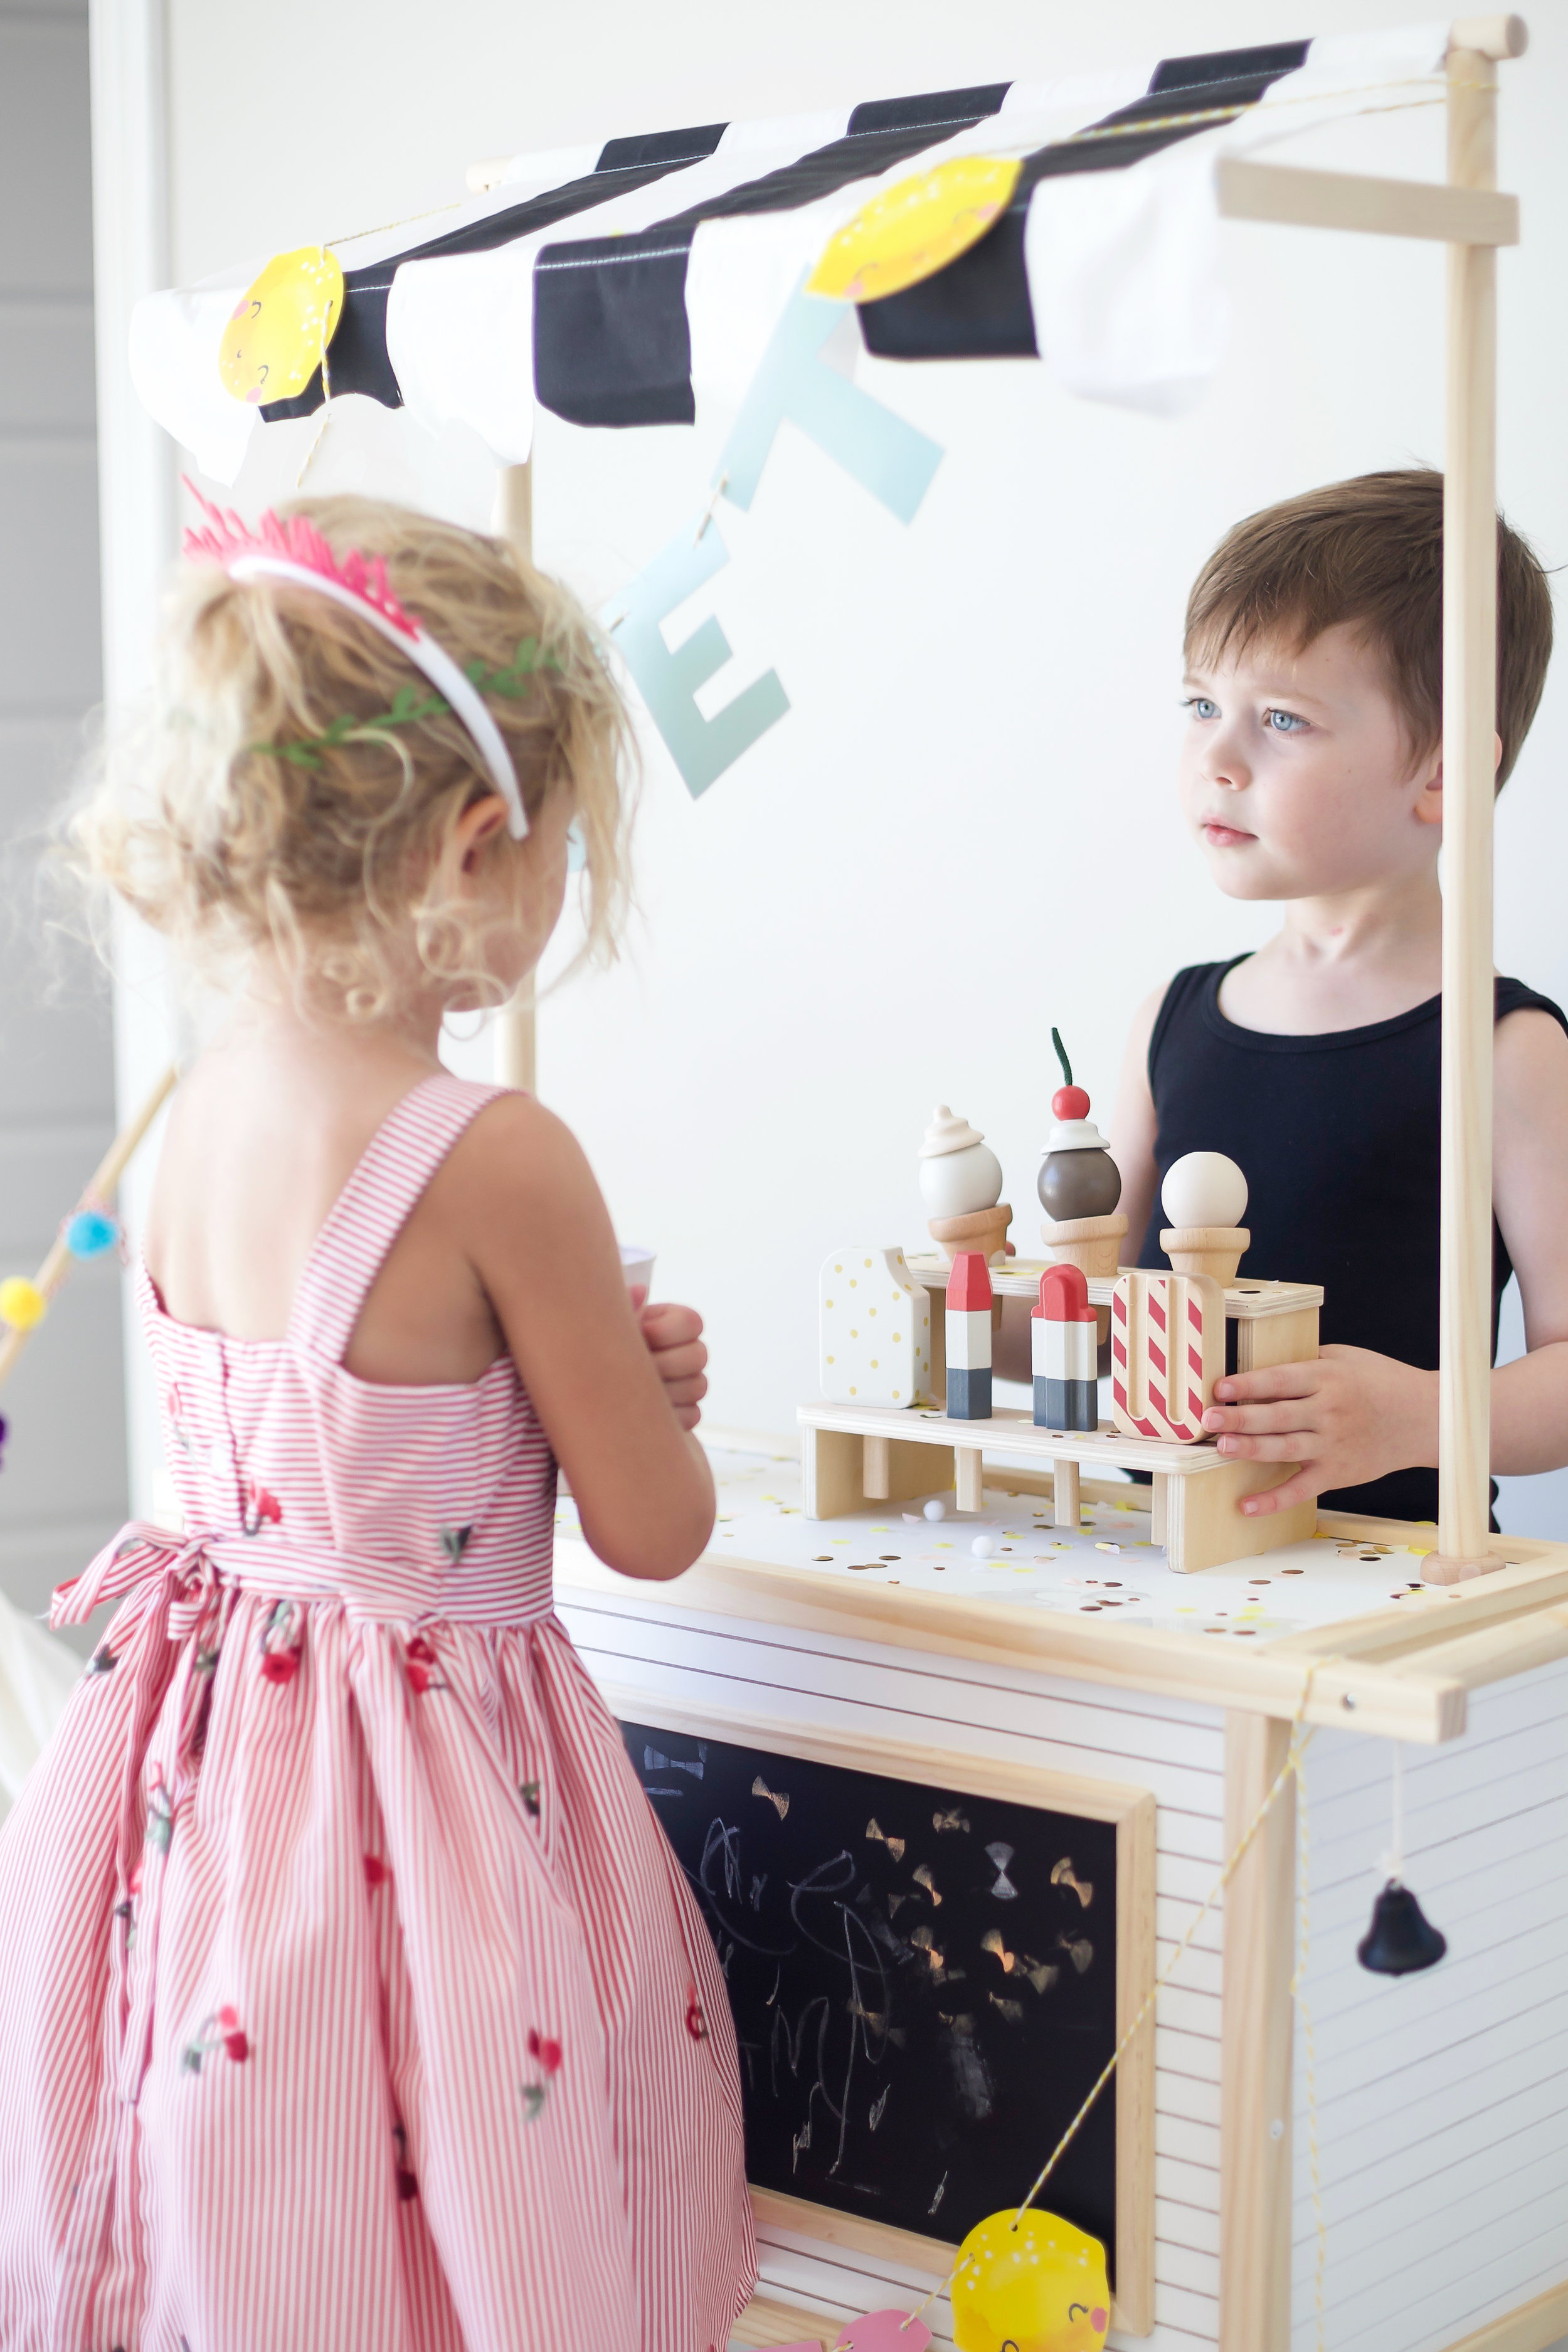
This kid’s market shop cart from Hand and Hearth by Magnolia at Target was the best birthday gift and party accessory all wrapped into one! The wooden ice cream set is sold separately, but a must-have with the cart.

IMG_5591.jpg
DSC_0311.jpg
 
DSC_0197.jpg
DSC_0269.jpg
DSC_0276.jpg
DSC_0242.jpg
DSC_0305.jpg
DSC_0216.jpg
DSC_0339.jpg
IMG_5592.jpg
DSC_0313.jpg
DSC_0203.jpg
DSC_0315.jpg
IMG_5558.jpg
DSC_0205.jpg
Yum

Salted peanut butter cookies with chocolate chips {gluten free}

DSC_0057.jpg
DSC_0068.jpg
DSC_0072.jpg
DSC_0094.jpg

RECIPE

recipe from A Pinch of Yum and new Love Real Food cookbook, by Kathryne Taylor.

Salted peanut butter chocolate cookies {gluten free}

GLUTEN & REFINED SUGAR FREE

dessert

serves: 12 (24 cookies)
prep time: 10 min.
total time: 22 min.

INGREDIENTS

  • 2 cups lightly packed coconut sugar

  • 2 eggs

  • 1 teaspoon vanilla

  • 1/4 teaspoon salt

  • 1, 16-ounce jar creamy peanut butter (1 1/4 cups)

  • 1 cup chocolate chips (optional)

INSTRUCTIONS

  1. Preheat the oven to 350°F. Line a large rimmed baking sheet with parchment paper..

  2. In a medium bowl, combine the coconut sugar and eggs and whisk until smooth. Whisk in the vanilla and salt until blended.

  3. Add the peanut butter and whisk until the dough is smooth and the peanut butter has completely blended into the batter. Add the chocolate chips and stir until the chocolate chips are evenly incorporated.

  4. Chill the dough for 15 minutes before proceeding.  Use a 1-2 tablespoon cookie dough scoop of dough onto the prepared baking sheets, leaving 1 to 2 inches of space around each one. Chill any remaining dough while you bake the first batch.

  5. Sprinkle each cookie with a little bit of salt and bake until the cookies are golden at the edges but still just a little underdone in the center, 11 to 13 minutes. Let the cookies rest on the hot baking sheet for 2 minutes before transferring them with a metal spatula to a cooling rack to cool completely.  Repeat with the remaining dough.

Storage

These cookies keep well at room temperature for about 4 days, and freeze well for up to 3 months.

Notes

The biggest variable here is the peanut butter ... If your peanut butter is on the softer side, chill the dough for at least 15 minutes – maybe more like 30.


Yum

Potato Crusted Vegetable Quiche {gluten free}

IMG_3454.jpg
DSC_0147.jpg
DSC_0142.jpg
DSC_0140.jpg
DSC_0144.jpg

RECIPE

Potato Crusted Vegetable Quiche

GLUTEN FREE

breakfast

serves: 4
prep time: 10 min.
total time: 40 min.


INGREDIENTS

Crust

  • 1 lb of potatoes: I used baby red and white bapotatoes - red white. 

  • 3 Tablespoons olive oil

  • 1 Tablespoon of parmesan cheese

  • 1 teaspoon salt

  • 1/4 teaspoon pepper

Filling

  • 6 eggs

  • 1/4 cup milk

  • 1/4 cup cheddar cheese

  • Meat (optional):

    • 4 pieces of turkey bacon, chopped

  • Veggies:

    • 1/2 onion, chopped

    • 1 cup grape tomatoes, halved

    • 1 cup broccoli  

    • 3 cups spinach, chopped

  • 1/2 teaspoon salt and 1/4 pepper or to taste 


INSTRUCTIONS

Crust

  1. Preheat oven to 400 degrees F.

  2. Thinly slice potatoes with a knife or mandoline.

  3. Put the sliced potatoes in a bowl and drizzle with olive oil, 1 teaspoon of salt, 1/4 teaspoon of pepper, and 1 Tablespoon of parmesan cheese.  Use your hands to evenly coat.

  4. Lay potato slices in a pie dish starting from the middle and working your way out, overlapping the potato slices.  Line the edge of the pie dish with overlapping potato slices.  Fill in any gaps with leftover potato slices.

  5. Bake the potatoes for 15 min or until the potatoes are cooked and not yet brown.

Filling

  1. Lower oven temp to 350 degrees. 

  2. Saute turkey bacon until crispy and set aside.

  3. Saute veggies: onion, broccoli, tomatoes and spinach until tender (add tomatoes and spinach just for last minute because they cook quickly)

  4. Mix eggs, milk, cheese, and salt/pepper to taste.

  5. Add veggies and egg mix to baking dish. 

  6. Cook for 30 minutes or until eggs have set.  

Keep leftovers an airtight container in refrigerator.


Yum

Soft and fluffy chocolate chip cookies {gluten free}

DSC_0038.jpg
DSC_0027.jpg
DSC_0022.jpg

original recipe from A Pinch of Yum's, "The best soft chocolate chip cookie" (I added some healthier twists)


RECIPE

Gluten Free Chocolate Chip Cookies

GLUTEN & REFINED SUGAR FREE

Dessert

serves: 6
prep time: 10 min.
total time: 20 min.

INGREDIENTS

  • 8 tablespoons of salted butter
  • 1/2 cup organic, raw cane sugar
  • 1/4 cup packed coconut sugar
  • 1 teaspoon vanilla
  • 1 egg
  • 1 1/2 cups GF all purpose flour (I used Bob's Red Mill Gluten Free 1 to 1 Baking Flour
  • 1/2 teaspoon baking soda
  • 1/4 teaspoon salt
  • 1/2 cup chocolate chips

INSTRUCTIONS

  1. Preheat the oven to 350 degrees. Microwave the butter for about 40 seconds to just barely melt it. It shouldn’t be hot – but it should be almost entirely in liquid form.
  2. Beat the butter with the sugars until creamy. Add the vanilla and the egg; beat on low speed until just incorporated – 10-15 seconds or so
  3. Add the flour, baking soda, and salt. Mix until crumbles form. Use your hands to press the crumbles together into a dough. It should form one large ball that is easy to handle (right at the stage between “wet” dough and “dry” dough). Add the chocolate chips and incorporate with your hands.
  4. Roll the dough into 12 large balls and place on a cookie sheet. Bake for 9-11 minutes until the cookies look puffy and dry and just barely golden.  *DO NOT OVER-BAKE:  Take them out even if they look like they’re not done yet. They’ll be pale and puffy.
  5. Let them cool on the pan for a good 30 minutes or so ...  

Keep in an airtight container or freeze


NOTES

  • The 3 most important things about this recipe are
  1. melting the butter,
  2. adding enough flour
  3. not baking for too long.
  • If you find that the dough is wet and it REALLY sticks to your hands, you probably need a little more flour. This is important otherwise you’ll have flat cookies. I’ll usually add a few tablespoons at a time to get it to the right consistency. You should be able to roll the balls of dough between your hands without any issues.
  • Reference the BEST guide from A Pinch of Yum, pictured below:
Guide from A Pinch of Yum

Guide from A Pinch of Yum


DSC_0087.jpg
DSC_0019.jpg
DSC_0066.jpg
DSC_0057.jpg
DSC_0020.jpg
DSC_0060.jpg

Yum

Floral Ice Cubes

DIYs are like first dates . . . They need to be easy, require little to no special skills, and bring an irreplaceable wow factor to the table.  If that doesn't happen, it's most likely they won't ever happen again. 

Further, this great first date or perfect DIY should leave you energized and thinking of all the creative spin offs of the next go round.

Floral ice cubes are this.  2 steps, check.  Wow factor, check.  And yes, I can't wait for the next go round . . . I'm thinking frozen candies, fruit, herbs and more!


HOW TO

1.  Place edible flowers in bottom of ice cube tray.

2.  Fill with water and freeze.

3.  Dazzle your water, mocktail, cocktail, etc.!  


Yum

Fourth of July Independence

Yum

Mixed Patterns and Summer Blues

Yum

Kennedy Celebrating Easter at the Biltmore

Yum

Kennedy at The Farm in Short-Sleeve Floral Bodysuit Set

Yum

Kennedy in Flutter-Sleeve Floral Romper


Yum

Kennedy in Winter White

Yum

Kennedy Holiday #OOTD

Yum

Kennedy Holiday #OOTD

IMG_1554.jpg
Yum

Kennedy Holiday #OOTD

IMG_1734.jpg
IMG_1767.jpg
Yum